Syllabus
Hao Ye Health Science Center Libraries, University of Florida (updated: 2022-10-03)
Intro
- Motivations R packages are the primary means of bundling R code. Packages have many use cases, including:
- re-using code or data across projects
- writing open source software
- creating reproducible analyses
- Learning Outcomes By the end of the workshop, participants will be able to:
- create working R packages with code and data
- write documentation using
roxygen2 - describe additional package-related tools (e.g.
pkgdown,testthat)
Creating R Packages
-
Setup Before getting started, there are some tools to install to make creating packages easier.
I recommend using
RStudioas a development environment. -
Creating a new R package
devtools::create("myDemoPkg")- package names have to start with a letter and can only contain letters, numbers, and periods.
myDemoPkg
├── .gitignore
├── .Rbuildignore
├── DESCRIPTION
├── myDemoPkg.Rproj
├── NAMESPACE
└── R/
- package names have to start with a letter and can only contain letters, numbers, and periods.
-
What are these files?
-
.gitignoretells git to NOT track certain files -
.Rbuildignoretells R to NOT include certain files when building the package -
DESCRIPTIONcontains basic metadata -
myDemoPkg.Rprojis the RStudio project -
NAMESPACElists the objects to load with the package -
R/contains the R code
-
-
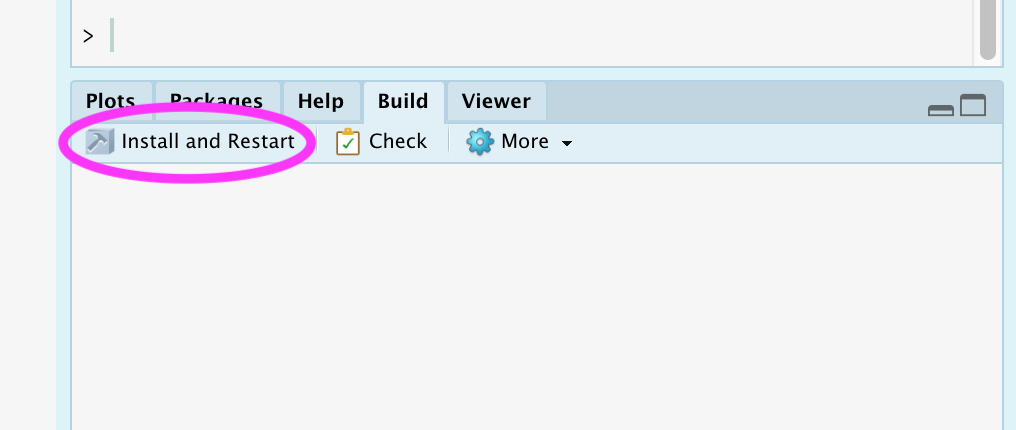
Building the Package
-
R Console
devtools::install()OR
RStudio Build Pane
-
Demo
-
Fully Operational!
- Next Steps:
- syncing to GitHub
- adding DESCRIPTION info
- adding data and code
- adding documentation
- Next Steps:
Syncing to GitHub
- Why GitHub?
note: other cloud services exist (e.g. GitLab) – we restrict ourself to GitHub in this course
-
Cloud-based backup of your new package
- private repos are only visible to whom you give access to
-
Supports installation from R
remotes::install_github("{username}/{repo}")
# remotes::install_github("ha0ye/myDemoPkg")
- Setup (local)
Install Git and register a GitHub account - https://happygitwithr.com/install-intro.html
-
Establish a Git repo for the project and make an initial commit
usethis::use_git()
- Setup (GitHub, via
usethis)-
Using a personal access token (PAT) that has permissions to create repos
usethis::use_github()(see https://usethis.r-lib.org/reference/github-token.html for more info on tokens) OR
-
- Setup (GitHub, manual)
- create a new repository
- ideally same name as your package folder
- choose public or private
- SKIP initialization
- RStudio, click “New Branch” on the “Git”Pane
- create a new repository
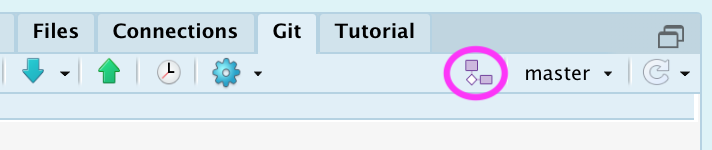
- Setup (GitHub, manual)
- Click “Add Remote”
- use
originfor the “Remote Name” - copy-paste URL from GitHub (shown after creating new repo) for “Remote URL”
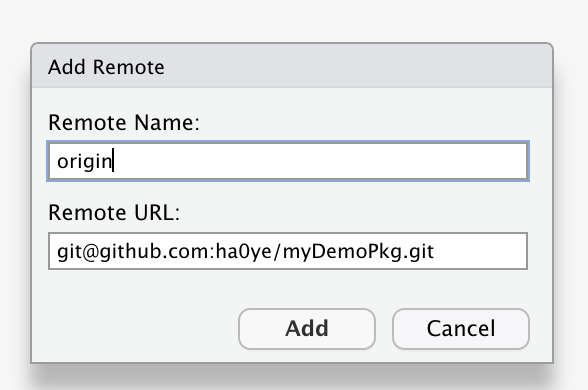
- use
- Click “Add Remote”
- Setup (GitHub, manual)
- Choose the same “Branch Name”.
(Select “Overwrite” at the warning about a local branch already existing.)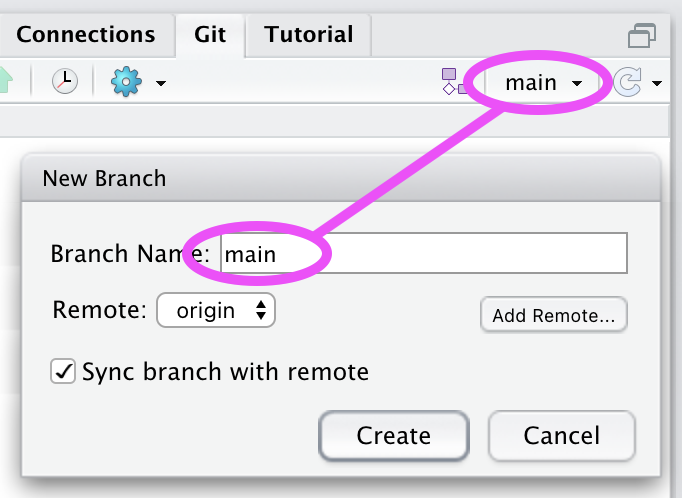
- Choose the same “Branch Name”.
- Demo
- Workflow
- work on the package
- commit the changes
- push to GitHub
Updating DESCRIPTION
- Parts of a DESCRIPTION
- package name
- 1 sentence title
- version number
- package authors
- 1 paragraph description
- license
- dependencies
- Editing DESCRIPTION
- plaintext file
- you only need to fill out most fields once
- a license determines how you allow other people to use it
- usethis has defaults built-in:
usethis::use_mit_license()- see also https://choosealicense.com/
- Adding Dependencies
- Any packages that you use code from, other than the
basepackage, need to be listed as dependencies. - Functions from those other packages need to be referred to by
{pkg}::{fun}. - The
use_packagefunction will add a package to the dependencies inDESCRIPTION.
usethis::use_package("utils") - Any packages that you use code from, other than the
Data and Code
- Code
- Create functions in files within the
R/folder.
f <- function(df) { names(df) } - Create functions in files within the
- Exporting functions
-
NAMESPACEneeds to include the names of objects to be loaded alongside the package. - Rather than modify the
NAMESPACEfile directly, it is preferable to usedevtoolsandroxygen2to createNAMESPACEfor us. - We add specially formatted comments around our code, and then call
devtools::document()to generate the documentation files.
-
- Updating NAMESPACE
- Adding
#' @exportright before an object will include it inNAMESPACE:
#' @export f <- function(df) { names(df) } - Adding
- Adding datasets
- Use
usethis::use_data()to export a dataset to a file and add that file to the package:
dat <- data.frame(x = 1:3, y = 5:7) usethis::use_data(dat) # no quotes - Use
Documenting Code
-
roxygen2
- R expects documentation to be written in a specific format,
.rd, and stored in theman/folder- this is a pain.
-
roxygen2adopts the idea ofdoxygenfor R:- code and documentation appear together (specific comments get turned into docs)
- easier to maintain consistency
- R expects documentation to be written in a specific format,
-
Example
#' Get the column names of a data.frame #' @param df A data.frame #' @return a character vector #' @export f <- function(df) { names(df) } -
Data
- Datasets can be documented, usually within the
data.Rfile:
#' Example data.frame #' #' @format A data frame with 3 rows and 2 variables: #' \describe{ #' \item{x}{some numbers} #' \item{y}{some other numbers} #' } "dat" - Datasets can be documented, usually within the
Extras
- Some other useful add-ons
- writing tests for your functions?
check outtestthat - want a nice website for your package?
check outpkgdown - want tests and the pkgdown website to run automatically on github? check out github actions
usethis::use_github_action("check-release") - writing tests for your functions?
Research Compendia
- Research Compendia ### Q: How do you share a data analysis reproducibly? ### A: Turn it into an R package!
- write functions to do analysis
- include data, or code to retrieve data
- write-up workflow as a package vignette
- Benefits
- Your project follows the common structure of an R package.
- dependencies have to be listed
- functions preferred over scripts
- tests are more naturally created
- example - https://github.com/ha0ye/portalDS
- Your project follows the common structure of an R package.
Summary
- Summary
- even simple packages can be handy
- shared code for your lab
- custom ggplot themes for yourself
- structuring your work in packages promotes re-use and reproducibility ## Thanks
- even simple packages can be handy
- Let me know what content you’d like to see
- Contact me for additional questions or consultation requests!
- Check back in on the libguide for more modules and contact info: